1. Standard Oriya Keyboard Layout
High resolution image suitable for printing.
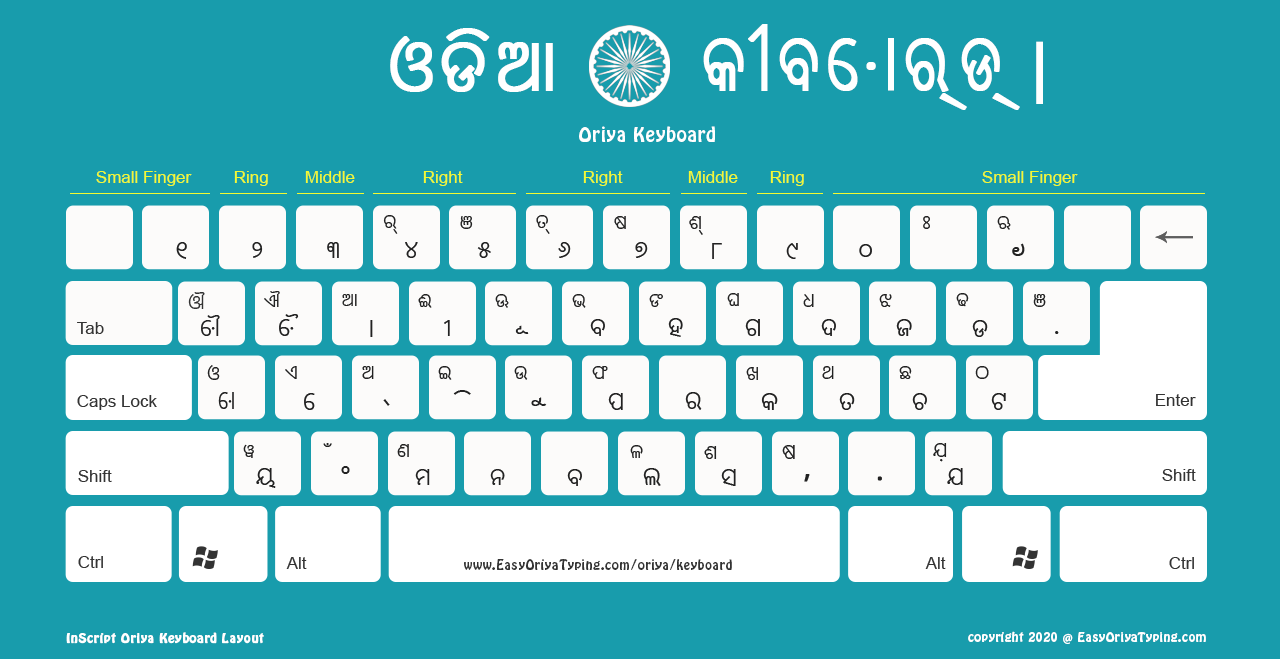
We have five different Oriya keyboard layouts for you to download on your computer. Once downloaded — you can use it as a reference to type in Oriya either on Word document or any other text editor. You also need to download the matching Oriya fonts.
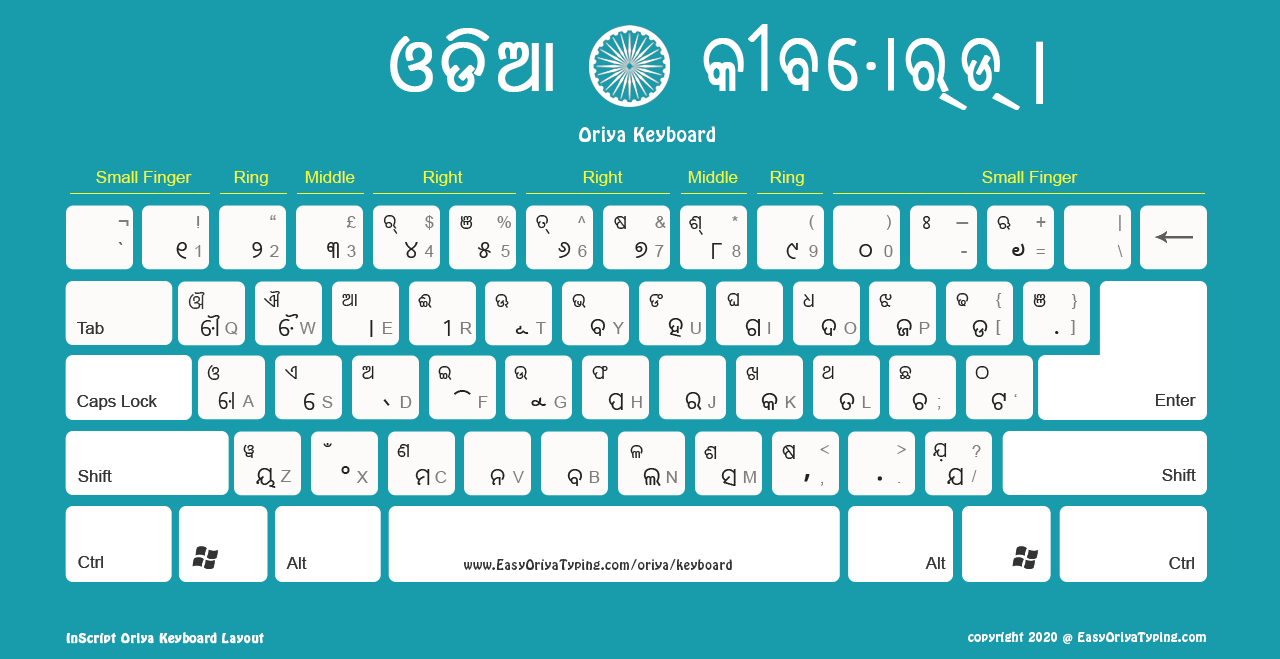
High resolution image suitable for printing.
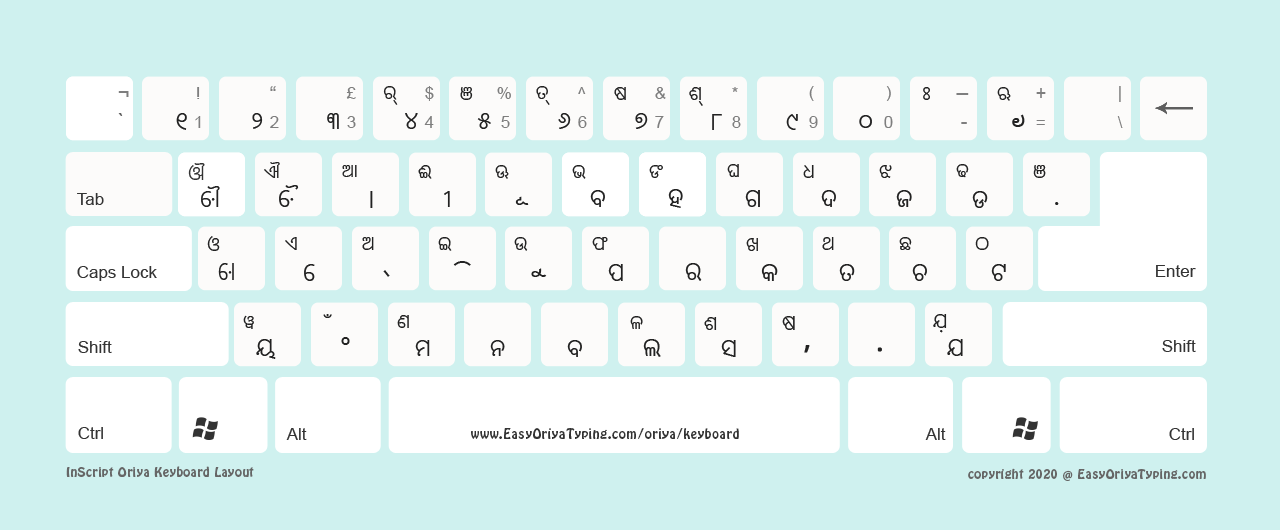
High resolution image suitable for printing.
High resolution image suitable for printing.
High resolution image suitable for printing.

High resolution image suitable for printing.

Getting started with Oriya typing is simple! Follow our step-by-step process.
Install Odia font — head over to our extensive fonts repository and install your preferred typeface.
Download your ideal keyboard image through this simple downloading process:
Browse and click on your preferred keyboard style
Right-click anywhere on the enlarged image
Choose "Save image as..." and pick your storage location
Prepare your writing space by launching your go-to text application and activating the Oriya font you installed in step one.
Begin your Oriya writing journey! Display your keyboard reference image alongside your text editor for seamless typing guidance.
Space-saving tip: Working on a compact setup? Our high-resolution keyboards deliver stunning print quality — create a physical reference that's always within reach!
Ensures traditional accuracy — each layout preserves authentic Oriya script conventions and cultural writing traditions.
Offers complete flexibility — choose from multiple styles and backgrounds to match your personal or professional preferences.
Includes unrestricted usage rights — download, print, share, and modify for any purpose without limitations or hidden costs.
In the fast-paced world of retail, hospitality, and logistics, the printer is often taken for granted—until it stops working. The XPrinter XP-80C is a popular, rugged, direct thermal POS printer known for its 250mm/s print speed, 80mm paper width, and automatic cutter. But without the correct driver, this reliable workhorse becomes nothing more than an expensive paperweight.
When the driver is right, the XP-80C hums along—printing hundreds of crisp receipts, kitchen orders, or shipping labels per hour, cutting cleanly every time, and opening the cash drawer without fail. When it’s wrong, you’ll spend hours on forums. Choose wisely. Visit the official XPrinter download center (search “XP-80C driver download”) and always match your Windows version (32-bit vs. 64-bit). Avoid “driver updater” software—most are adware.
This feature explores everything you need to know about the XP-80C driver: why it matters, how to install it, and how to fix it when things go wrong. A driver is a software translator. The XP-80C driver converts print jobs from your operating system or application (e.g., a cash register, restaurant POS, or shipping label software) into a language the printer understands—typically ESC/POS (Epson Standard Code for Point of Service).